sunset harvest

Saturday, December 24, 2011

Cindy's Microwave Carmel Corn

A very traditional Christmas treat, and if you don't already make this, you are missing out. This is addicting and something you can't help but reach your hand in the bowl and take a few each time you pass by. I am very thankful as my mom took the pictures and made this, as I hurried off to Christmas Eve mass, so thanks mom!
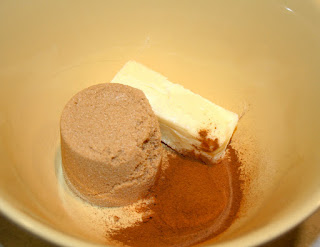
Brown sugar, Butter, White corn syrup, popcorn and salt, and missing from the picture, baking soda. That seems simple enough. My mom has a nice air popper she used to pop all the popcorn in. You need a total of 6 quarts of popcorn. Prepare your bag, you will need a brown grocery bag, and cut the top off, leaving about 8 inches at the bottom. Spray the brown bag with cooking spray. Place all the popped pop corn in the bag.
Combine the brown sugar, butter, white corn syrup, and salt. Cook in microwave on full power for 2 minutes. Stir, and cook on full power for 2 more minutes. Add 1/2 tsp. baking soda, and stir. Pour hot syrup over popcorn.
Cook on full power for 1 1/2 minute, and stir. Cook on full power for 1 1/2 minute and stir. Cook on full power for 45 seconds, and stir. Pour onto wax paper and let cool. Store in airtight container.
This is a nice holiday treat, but I don't think that would stop me from making it any time of the year!


Microwave Carmel Corn


Prepare 6 quarts of popped popcorn. Using a brown grocery sack, cut the top off, leaving 8 inch bottom.
Combine:
1 c. brown sugar
1/2 c. butter
1/4 c. white corn syrup
1/4 tsp. salt
Microwave for 2 minutes on high. Stir. Microwave for an additional 2 minutes and stir, add 1/2 tsp. baking soda

Place popcorn in bag and pour hot syrup over popcorn.

Cook : full power 1 1/2 minute-stir
full power 1 1/2 minute-stir
full power 45 seconds-stir

Pour onto wax paper and let cool. Store in airtight container.

Chocolate and Peanut Butter

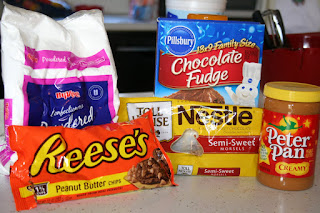
I have always wanted to make some bite size brownies..seems easy enough...and how about adding some peanut butter to them as well. Even better!
The line up..pretty basic, I didn't include the ingredients you will need for the box brownie mix. Prepare the brownie mix, and pour into the mini muffin tin. Bake at 350 for 13-15 minutes. Once you remove wait a few minutes, and if the centers don't fall use the back of a spoon to press down the centers. I used a powder sugar/peanut butter mixture to spoon into the brownies then topped each one with some chocolate and peanut butter chips. This was easy and the results were just as I expected, delicious!

Peanut Butter Brownie Bites

Preheat oven to 350 degrees

1 box of brownie mix, made according to package directions

Spray mini muffin tin and pour in brownie batter. Bake for 13-15 minutes and remove. Once insides fall, or you can press with the back of a spoon, wait to cool.

3/4 cup peanut butter
1/2 cup powdered sugar (can also be omitted)
1/2 cup peanut butter chips
1/2 cup semi sweet chocolate chips

Place peanut butter in microwave safe bowl and microwave for about 40 seconds then stir in powdered sugar. While the brownies are still warm, spoon or pour peanut butter into each brownie bite. Top with a few peanut butter and chocolate chips on each bite.

Wednesday, December 14, 2011

Another winning sauce!

For my picky anti sauce husband I passed another sauce over him, Teriyaki sauce to be more specific, and in conclusion..he Loved it! Well, love would be a strong word..but when I started dishing up dinner he gave me the "look" and I asked how much sauce he wanted on his, and he said, just a little. Needless to say he went back for more! I love teriyaki so when I saw this version in the crock pot I had to try it! I will be making this again soon, and more of it. The kids asked for more, so I found myself giving up my portion for them. I think this would be very good the next day too, so next time, making a lot more! In the picture I have boneless, skinless chicken thighs. I have read all the debates over thighs vs. breast, and I think in the crock pot the thighs are the way to go. The flavor to me is a lot better and in the crock pot I don't worry about not cooking it all the way. Now, I knew that Doug would say something about the chicken, and he did. So I did throw in one boneless skinless chicken breast, so that when the question was asked I could say there was both, white and dark meat.
I love all the ingredients in this meal. This is one of those crock pot meals that does not require cooking all day. This only took 4 hours on low for me till the meat was tender and cooked. After you mix all the ingredients pour them over the chicken and set on low. When the chicken is finished cooking, remove the chicken to a plate and skim the fat off the liquid. Pour the liquid in a small saucepan and bring to a boil. Mix the water and cornstarch together and pour into liquid, constantly stirring until thickened. While I did this, I placed the chicken back in the crock pot to keep it warm, it was only about 5 minutes. I made rice and put the chicken on top and then topped with the teriyaki sauce. Enjoy!

Crock Pot Teriyaki Chicken

6-7 Boneless, Skinless Chicken Thighs
3/4 cup sugar
1/2 cup soy sauce
6 TBLS cider vinegar
3/4 tsp ground ginger
3/4 tsp minced garlic
1/4 tsp ground pepper

Combine ingredients. Place chicken in crock pot and pour sauce over. Cook on low 4 hours.
Remove chicken when cooked and keep warm. Skim fat off top of sauce, I just use a large spoon, I am sure there are better ways but this is how I did it. Place sauce in saucepan and start to bring to a boil.
Mix together
4 1/2 tsp water
4 1/2 tsp cornstarch

Add water/cornstarch to sauce and continuously stir till thickened. Serve chicken with sauce over rice

Monday, December 12, 2011

Dinner TONIGHT!

I have made two amazing dinners the last two nights and really couldn't decide which one to post first, so I will just go in the order I made them. Up first, Pizza Balls! These things were amazing! I was going to just make some calzones but then went a step further and just sealed up the bottoms and made them into rolled dough balls! They were delicious, and easy to eat as well! I think this would be an ideal meal for the nights when there are too many ball games or practices to invest a lot of time into dinner. I think you could even make them up a head of time and then place them in the fridge till it was time to throw them in the oven. We stuck to the simple pepperoni and sausage, if I didn't have the picky eaters in the house I would have maybe branched out a bit more.
Starting at the very beginning, make sure you cook your sausage, I know, sounds basic, but you never know. I then sliced the pepperoni into slices, more bite size. I strongly dislike when you take a bite of pizza and the whole piece of pepperoni comes off with all the rest of the toppings attached! Roll the pizza dough out onto a clean, lightly floured surface and then using a pizza cutter, slice into squares. I got 12 squares out of one piece of dough. Making this next time I think I would double and do another roll of dough, we had 2 leftover but they tasted just as good the next day. Place the toppings on top of the squares, and then fold up sides and shape into ball.
Place seamed side down in a greased baking dish, I used a pie dish. Then I melted some butter and added some Italian seasoning, garlic salt, and brushed on top of the pizza balls, and then sprinkled grated Parmesan on the top. While they are baking, warm up some pizza sauce to serve on the side for dipping sauce.
I need practice in making them all uniform size, but these were enjoyed by everyone regardless!
Pizza Rolls

Preheat oven to 400 degrees

1 can refrigerated pizza dough
assorted toppings, pepperoni, sausage, cheese
2 TBLS butter
1 tsp. Italian Seasoning
1/2 tsp. Garlic powder
Grated Parmesan cheese
Jar of pizza sauce

Roll out dough and using pizza cutter, slice into 12 squares. Place toppings on center and fold up side press together to seal and place seam side down in a greased baking dish (pie pan). Melt butter and add Italian seasoning and garlic powder, mix to combine and brush over dough. Sprinkle Parmesan cheese over entire dish. Bake for 15-18 minutes. Warm sauce to serve on the side to dip the rolls into.

Thursday, December 8, 2011

Cookie Dough and Cheesecake

The title says it all, cookie dough in the cheesecake with an Oreo cookie crust. Easy! My mother in law makes the Oreo cheesecake but why not put some cookie dough in there to make it taste even better!?! I made these for Thanksgiving this year, I know, not traditional at all, but I think sometimes it is necessary to branch out a bit and I am glad I did! Your line up starts with cream cheese, sugar, flour, sour cream, eggs and vanilla.
Start by beating with an electric mixer the cream cheese, sugar, eggs and flour on high till smooth. Add the vanilla and sour cream and careful not to over mix, just add and mix till blended.
For the cookie dough line up, butter, sugar, brown sugar, salt, milk, vanilla, flour and mini chocolate chips. Mix softened butter with sugars, add the milk and vanilla. Next add in the flour, salt and chocolate chips. Roll into small balls, about the size of a teaspoon. Place in freezer to firm on a wax paper lined baking sheet. Place cupcake liners in muffin tin and then place one Oreo at the bottom of each liner.
Place about 4-5 cookie dough balls on each cookie, or you could add them to the cheesecake batter and incorporate that way. Pour the cheesecake batter over the cookie dough.
Bake for about 15-18 minutes at 350 degrees. Most of mine did crack on the top, but once they cooled they were fine! I think you could go a step further and add some whipped cream for garnish, but to me they were just as good without any whipped cream! These are easy to pick up and eat and don't require a fork or a plate!

Oreo Cookie Dough Cheesecake
Preheat oven to 350 degrees

Prepare the cookie dough:
1/2 cup butter, softened
1/2 cup sugar
1/2 cup brown sugar
2 TBLS milk
2 tsp vanilla extract
1 cup all purpose flour
1 cup mini chocolate chips

Beat the butter and sugars together till combined. Add the milk and vanilla extract. Add in flour and chocolate chips. Shape in teaspoon size balls and place on wax paper lined baking sheet. Place in freezer to firm while making cheesecake batter.

Cheesecake:
4 (8 oz) blocks cream cheese softened to room temperature
1 cup sugar
4 large eggs
1 tsp. all purpose flour
1 tsp. vanilla
1 cup sour cream

At a high speed with an electric mixer beat the cream cheese, sugar, eggs and flour till blended. Add vanilla and sour cream, and mix, careful not to over mix.

Line muffin tin with paper baking cups, place Oreo in bottom of each liner. Place 4-5 balls of cookie dough and then fill with cheesecake batter. Bake for 15-18 minutes until set. Remove and let cool in pan for a few minutes before removing to cooling rack.
Tuesday, December 6, 2011

Annie Again

Once again Annie came through with a wonderful easy recipe for me to try for a friends annual cookie exchange party. In the past I have typically chosen a complex recipe and it never failed that it ended with me putting in way too much effort followed up by a call to my BF in California complaining about how much work just went into the dozens of cookies I just made. So thankfully this year Annie gave me her recipe for Thumbprint Cookies. These bring up great memories of spending Christmas with my Papa growing up as well. Christmas Eve was always spent at my Papa's house. He over did Christmas every single time, even after my mom and aunts would beg him not to go so above and beyond. I can remember the words coming out of their mouths after each and every gift was given, "John that's too much. Next year you don't need to do so much." But that never stopped him! As the oldest grandchild I was so thrilled each time Christmas rolled back around because I knew without a doubt that Christmas eve would be the best part of Christmas. Sure the presents were over the TOP but the memories and the traditions that he started and did year after year will be a part of me forever. He would always have the same dessert line up and that included the cookies that were made from Roslyn bakery in Indianapolis that were just like these. Even though we always had the ham and all the side dishes first, my sister Katy and I would take turns walking by the dessert table over and over again and grabbing a cookie on our passing. Holidays can be hard when you are missing that special family member, or multiple members, however it is the little things that trigger the memories that matter the most.
I was supposed to bring 4 dozen cookies the exchange. I doubled the recipe to make sure I had enough, if you cut the recipe in half you should end up with approximately 3 dozen cookies. Mix the butter, Brown sugar, egg yolks, vanilla, flour and salt till incorporated. Place pecan pieces in a Ziploc bag and roll or pound into small pieces. Roll the dough into balls and then roll in the pecan pieces. Place on baking sheet and bake 6-8 minutes. I used my small cookie scoop to keep the cookies small and so I made sure I had enough for cookie exchange. Turns out, I made enough for the cookie exchange and then thought I would freeze the rest for Christmas, but I don't know what happened to the cookies I was going to freeze..they disappeared! Sad to say, that it was all me. Grace maybe had one..Doug had maybe 4 and Jack didn't have any, so I consumed way too many of these cookies!
Remove cookies and press a dent into the dough. I found that my melon ball scoop worked best to make a nice dent in the cookie, but you could also use the back of a spoon or even just a small measuring spoon. Place back in the oven for 1-2 more minutes.
To make the icing mix together the butter, cream cheese, vanilla, milk, and vanilla. You can either spoon the icing into the cookies or pipe in with a decorating tip. Make sure the cookies are cooled before you start putting the icing in. I enjoyed these cold from the fridge, obviously, as I don't have any in the freezer for Christmas!


Thumbprint Cookies
from Annie
(Makes about 3 dozen)

Preheat oven to 350 degrees

1 cup butter
1/2 cup brown sugar
2 egg yolks
1 tsp. vanilla
2 cups flour
1/2 tsp. salt

Combine and roll into balls. Roll in crushed pecans and place on parchment lined baking sheet. Bake for 6-8 minutes, remove and press down with thumb or back of a spoon. Place back in oven for 1-2 minutes. Remove and let cool.

Icing
3 oz cream cheese
1 stick butter
1 tsp milk
1 tsp vanilla
1 3/4 cup powder sugar

Mix together and spoon or pipe into cookies


The Pioneer Woman's BBQ Meatballs

I have to say this is one of my favorite meals, Jack and I go head to head on this meal consuming our fair amount of meatballs. Doug..aka..Mr. Anti Sauce could probably pass on this meal as he feels the sauce is too "tangy". I love it though, and think it is a great comfort meal for any of the long winter nights we have ahead of us!
Mix up the ground beef, chopped onion, oats, salt, pepper, and then pour in the milk. Roll into Tablespoon size balls and place on wax paper lined baking sheet. Place in freezer for a few minutes firm. Mix together the ingredients for the sauce, sugar, ketchup, distilled white vinegar, Worcestershire sauce, and onion. Optional: Dash of Tabasco sauce.
Place about a 1/2 cup of flour into a large shallow bowl. Heat 4 Tablespoons of cooking oil in pan. When the oil is hot and ready, begin by placing the meatballs in the flour to coat, then fry till lightly browned. I like what the frying does to the texture of the meatball. I am sure this step can be skipped and you can cook them entirely in the oven by just adding a little more cooking time.
As you finish frying them place into a greased baking dish. When all meatballs are finished pour sauce over meatballs and place in oven for 45 minutes or until bubbly and hot!

Comfort Meatballs

Preheat oven to 350 degrees

For the meatballs
Mix together;
1 1/2 lb. ground beef
3/4 cup quick oats
3/4 cup milk
salt
pepper
3 TBLS minced onion

Once all incorporated, begin to mix into Tablespoon size balls and place on a wax paper lined baking sheet. Place in freezer to firm. They only need a few minutes, being sauce and heating up oil.
Heat 4 TBLS of cooking oil in pan. Place 1/2 cup flour in a shallow bowl.

Sauce:
1 cup ketchup
2 TBLS sugar
3 TBLS distilled white vinegar
2 TBLS Worcestershire sauce
4 TBLS minced onion

When oil is hot roll meat in flour and place in pan to lightly brown on all sides, do this in batches and once browned place the meatball in a greased 9/13 baking dish. When all meatballs are lightly browned pour sauce over and bake for 45 minutes or until hot.


Sunday, December 4, 2011

The Basics!

I almost didn't want to even post this as an actual recipe on here, but it is a great dinner and even if it just reminds you to make your own it is worth it! This is my daughters absolute favorite meal. She had 2 birthday party dinners this year and for both of them she requested TACO SALAD! She had family day at school last week, someone asked her what her favorite meal was, and again, TACO SALAD. She loves to load the sour cream on the top..definitely my daughter! Although sometimes I am able to get Jack to have salad, he usually opts for the taco like his dad. I could easily make this once a week! A lot of recipes call for beans or corn, but we like it simple and Grace and I are NOT fans of beans so here is the line up for our taco salad!
Brown your beef and make taco meat according to packet directions. While that is going get your lettuce washed, I use romaine hearts, I like the added crunch and I think it stands up well to the creamy dressings in this salad. Grace is hands down a ranch dressing queen. She uses it for almost everything, however in this salad she loves the mix of the 1,000 island and the creamy french. I use diced tomatoes, cheese, green onions, sour cream, and then of course some Frito's! I just add equal parts of the dressings and coat the lettuce, I mix in the cheese, tomatoes and green onions. Then place into bowls and place the taco meat, sour cream and Frito's on top.
This is so good, just looking at the picture makes me want to make it again tonight! Grace is still trying to understand why mom is always snapping pictures of food and then gets into it and asks for her picture to be taken with the food...so this is her with her big 'ol bite of taco salad! And yes, that bite looks enormous, however like I said, this is hands down her favorite so no bite is too big for this girl!


Saturday, November 26, 2011

Annie's Pizza Burgers

Straight from Annie in Monmouth, Illinois! This recipe was easy and a nice change to ordinary hamburgers! Pretty sure you will have all the ingredients already and this is easy! I think I added a bit too many red pepper flakes as Grace complained of the heat, so next time I will take that down!
Add oregano, garlic powder, salt, and red pepper flakes to hamburger meat. Form into patties and grill! Warm up some pizza sauce and then add provolone to burgers the last few minutes. Serve with sauce on top!
Pizza Burgers

1 lb. hamburger meat
1 tsp. ground oregano
1/2 tsp. garlic powder
1/4 tsp. salt
1/2 to 1 tsp. red peeper flakes (according to preference)
Provolone cheese
Pizza or Marinara Sauce

Add oregano, garlic powder, salt and red pepper flakes to ground beef. Mix together and form patties. Grill burgers and heat up sauce in a small saucepan. Add cheese to burgers and melt. Remove to plate and pour some sauce over the top. Enjoy!

Jalapeno Popper Chicken

Just as it sounds, a chicken stuffed with a jalapeno cheese mixture, fried to make it a little crispy then finished off in the oven. Not too hot for the kids (or me) as I only used one pepper. Think if you want some more heat, 2 peppers would be more appropriate. And I am sure the healthier version would not include the frying first, but I wasn't going for health points on this meal! Pretty basic list of ingredients, most of which you probably already have.
Add Image
Place softened cream cheese in bowl and add some cheddar cheese and the seeded and chopped jalapeno. In the thickest part of the chicken breast cut a horizontal pocket. Fill with as much cream cheese mixture as you can. I try to slide my knife down to the smaller part of the chicken if I am able, careful not to tear through. I found it easier to take some of the cream cheese mixture and roll it into a long log and then place it in the chicken breast. If you need to, place a toothpick to hold together. Roll chicken in a well beaten egg and coat in seasoned bread crumbs. Warm oil up and once the oil is hot place into pan. Cook on each side until nice and golden brown. If you want to fry till cooked through the internal temperature should read at least 165 degrees. I placed in the oven at 350 and baked for 3o minutes.
Delicious! This is an easy recipe and not too many ingredients necessary to add some good flavor to your chicken!
Just in case you still need some convincing...

Jalapeno Popper Chicken

3-4 Large chicken breast
1 package (8oz) softened cream cheese
1-2 seeded and diced jalapeno peppers
1/2 cup shredded cheddar cheese
1 cup seasoned bread crumbs
1 egg, beaten
1/4 cup cooking oil

Mix together cream cheese, cheese, peppers. In the largest portion of the chicken breast make a large cut. Stuff cream cheese mixture into the chicken. Secure chicken with toothpicks if necessary. Roll chicken in beaten egg and then coat with bread crumbs. Fry in pan till internal temperature reaches at least 165 degrees, or after browning place in 350 degree oven for 30 minutes until no longer pink.

Sunday, November 20, 2011

Overnight Cinnamon Rolls

On my first trip to California a few years ago to visit my bf...she spoiled me rotten and one of her many generous gifts was a cookbook, "Family Meals" by Maria Helm Sinskey. This has a lot of nice family meals and a few recipes I always go back to. I think my all time favorite has to be the overnight Cinnamon rolls. I have done a few variations to the original recipe and hope you try these soon! They do require some time in the morning to rise, but it is worth the wait!
In the bowl of a stand mixer sprinkle yeast over the water and allow to bloom for a few minutes, then whisk till smooth. Add in flour and cover with plastic wrap, place in a warm spot and let it stand for about 30 minutes.

Next add the eggs, sugar, salt, and remaining four cups of flour to the mixture and with the dough hook attachment on your mixer, knead on medium speed until smooth. Add the butter and continue to knead, adding a little flour to reduce the stickiness if needed and continue to knead for about 10-12 minutes. Cover with plastic wrap and allow to rise till it has doubled, about 2 hours. Transfer the dough to a floured surface and roll into a 15x10 inch rectangle. Mix softened butter with brown sugar and cinnamon and spread over the rolled dough.

Beginning on the long side, begin to roll dough and pinch seam together. Seam side down, cut into 12 rolls. Place in a greased 9x13 baking dish and spread melted butter over tops of rolls. Cover with plastic wrap and place in refrigerator overnight. The next morning remove and let rise again on the counter for about an hour. Place rolls in preheated oven and bake for about 30 minutes. While rolls are baking mix ingredients for the icing. Remove rolls from oven and let sit for about 10 minutes and then pour the glaze over the top of them..if you can wait that long that is! They are delicious!! I think I should work on sizing mine better, but in the end it really didn't matter too much!
Overnight Cinnamon Rolls
adapted from "Family Meals"

For the dough;
1 TBLS active dry yeast
1/2 cup warm water
4 1/2 cup all purpose flour
1 tsp kosher salt
4 large eggs
1/4 cup sugar
1/2 cup butter, room temperature
In the bowl of a stand mixer sprinkle yeast over the water and allow to bloom for a few minutes, then whisk till smooth. Add in flour and cover with plastic wrap, place in a warm spot and let it stand for about 30 minutes.
Next add the eggs, sugar, salt, and remaining four cups of flour to the mixture and with the dough hook attachment on your mixer, knead on medium speed until smooth. Add the butter and continue to knead, adding a little flour to reduce the stickiness if needed and continue to knead for about 10-12 minutes. Cover with plastic wrap and allow to rise till it has doubled, about 2 hours.
Filling;
1/2 cup butter, divided
3/4 cup packed brown sugar
1 TBLS cinnamon
Remove 2 TBLS of butter and set aside. Mix remaining butter with brown sugar and cinnamon. Transfer the dough to a floured surface and roll into a 15x10 inch rectangle. Spread mixture over dough, using your fingers if necessary. Beginning on the long side, roll and press the seam to seal. Cut dough into 12 rolls and place in a buttered 9x13 inch pan. With the butter that was set aside, melt and spread over the top of the rolls. Cover with plastic wrap and place in refrigerator overnight. The next morning remove and allow to rise on the counter for about an hour. Bake at 350 degrees for 30 minutes.
Icing
1 Cup powdered sugar
2 TBLS butter, melted
2 TBLS milk
1 tsp vanilla extract
Mix and pour over rolls. Enjoy!

Friday, November 18, 2011

Spaghetti Casserole

I used to eat at Fazoli's when I lived back in the great state of Indiana..then moved over to Illinois and was so pleased that they had one in my town..only to have it close down a few years after I moved here. I always ordered the same thing, the baked spaghetti. This recipe is hands down better, probably has a lot to do with the fact that it is homemade! I think this would make a nice meal to make up, and freeze and then bake when you are ready. I have some friends about to have their second child and will test this out on them, sure they won't mind being the Guinea pigs! This makes a lot, I sent the leftovers with Doug and the kids the next day to his parents while I went to work.
I made homemade sauce, I am sure the a jar of sauce would make this even easier, but Doug claims the jar sauce makes him sick. Little does he know, or maybe he does that more than a handful of times I have used the jar. Begin by cooking the pasta according to package directions. Melt 1 TBLS of butter in a medium sauce pan and add chopped onion and garlic. Once the onions have softened add the ground beef and cook till no longer pink, drain off any fat. Add basil and Italian seasoning and blend in with the beef. Add sauce and let simmer while you cook the pasta noodles.
Once the noodles are finished drain and add to a large bowl. Add cream cheese and Italian seasoning to noodles and stir to coat.
Spray a 9x13 baking dish and spread a small amount of sauce on the bottom. Add the noodles and spread out evenly. Top with remaining sauce and sprinkle with cheese. Bake for 30 minutes, let stand for about 10 minutes and serve. You will not be disappointed! This is delicious!
I also made homemade french bread to serve with this and will post that recipe soon!

Baked Spaghetti Casserole
adapted from Life as a Lofthouse

1 Package spaghetti noodles, cooked according to package directions.
Preheat oven to 350 degrees
For Sauce:
1 TBLS butter
1 medium onion, diced
1-2 cloves of garlic, diced (I use the jar stuff and add about 2 tsp)
1 lb. ground beef
1 Large can tomato sauce (I added an additional smaller can as well)
1 tsp. Italian seasoning
1 tsp. dried basil
Melt butter in medium saucepan and add onions and garlic. Add ground beef and cook till done. Drain fat and add Italian seasoning and basil. Mix till blended and add tomato sauce, let simmer while the noodles are cooking.

When noodles are done, drain and add to large bowl. Add the following
1 package (8 oz) cream cheese
1 tsp. Italian seasoning
Stir till combined
Spray a 9x13 pan with cooking spray. Spread a small amount of sauce in the prepared pan, add noodles and spread evenly. Pour remaining sauce over noodles.
Top with 1/2 cup of Parmesan cheese and 1/2 cup of mozzarella cheese (or in my case, whatever I had in the fridge!)
Bake uncovered for 30 minutes, remove and let sit for 10 minutes. Enjoy!


Tuxedo Cake

Time is flying by...I have lots of recipes to share...just as soon as I have some time! Grace is turning five in a week and I am in denial she could be this old! We have been busy and trying to deal with it being dark by 5:30. This is definitely not my favorite time of the year! I will get busy trying to share some new dinner ideas but wanted to share my first tuxedo cake...the challenge was made and I hopefully delivered on this one! I didn't take any pictures of the process, I was too concerned with the cake turning out OK the entire time!
It has three chocolate cake layers with a whipped cream filling between each cake and then frosted with the same frosting all around. A chocolate glaze is then poured all over the top and drips down the side allowing some of the white to still show through.


Saturday, November 12, 2011

Baked Crispy Chicken

This is a MUST make. I found this on Jamie Cook's it Up, and have been wanting to try it for awhile. Even my "Anti any type of sauce or dip" husband loved it and actually liked the sauce on top. Grace had two helpings and said it was the best chicken she has ever had. I don't know if I would go that far, but it was definitely one of the best. Thought I would have some left over for lunch, but not a chance!
It is always nice to find a new way to do chicken. I actually had a few other recipes to put up that didn't involve chicken but thought this was too good not to share right away! Begin by taking 2 sleeves of Ritz crackers and putting them in a small food processor, pulse till crumbly. I had a hard time keeping little and big fingers away from the crackers before I got them into the food processor. (That was possibly the hardest part of the meal) Next line up three bowls or shallow pie dishes would work nicely as well. Pour milk in one, cheese in the next one, and then the bread crumbs in the last bowl. Add salt and pepper to the bread crumbs to season.
Line the bowls up in that order, milk, cheese, crumbs. I began with 3 boneless skinless chicken breast and cut them into 3 pieces. Begin dipping! Place in a 9x13 greased baking dish as you go along. Once finished, cover tightly with foil and place in preheated 400 degree oven. After 35 minutes remove foil and cook for another 10 minutes till chicken is crispy. The last 10 minutes of baking time begin the sauce. Add once can of cream of chicken soup to a small saucepan along with sour cream and butter. Cook and stir often till all are incorporated. Remove chicken, plate it and top with sauce.

Crispy Cheddar Chicken
adapted from Jamie Cooks it up

3-4 Large Boneless Skinless Chicken Breast
2 Sleeves of Ritz Crackers
1/2 cup milk
2 cups shredded cheddar cheese
Salt
Pepper
1 Can Cream of Chicken Soup
2 TBLS. sour cream
2 TBLS. butter

Preheat oven to 400 degrees. Pulse bread crumbs in food processor. Place milk in bowl, followed by cheese, and then add crackers to final bowl. Cut each chicken breast up into three pieces. Grease 9x13 baking dish and begin assembly. Dip chicken and coat in milk, then cheese, finally the crackers and place in baking dish. Cover dish with foil and place in oven for 35 minutes. Remove foil and bake for 10 minutes, to brown and crisp the chicken. While chicken cooks place soup, sour cream, and butter in smalls saucepan, cook over medium heat and stir till hot. Remove chicken and top with sauce. Optional: Sprinkle dried parsley flakes over the top.